
Thank you for choosing Hampton Bay! Our ceiling fans combine quality, style, and energy efficiency, providing a comprehensive guide for installation, operation, and maintenance.
1.1 Overview of Hampton Bay Ceiling Fans
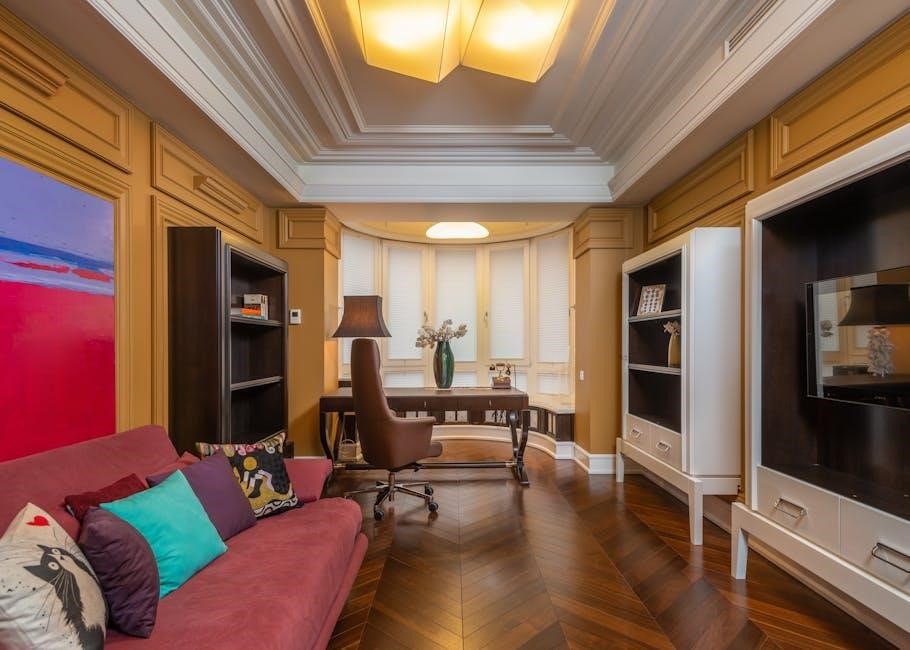
Hampton Bay ceiling fans are renowned for their durability, energy efficiency, and sleek designs, offering a perfect blend of style and functionality. Available in various styles and finishes, these fans cater to diverse home décors. Equipped with advanced features like remote controls and light kits, they enhance comfort and convenience. Designed with safety and quality in mind, Hampton Bay fans are built to last, providing reliable performance for years. Their energy-saving capabilities make them an eco-friendly choice for modern homes, ensuring optimal airflow while reducing energy consumption.
1.2 Importance of Reading the User Manual
Reading the Hampton Bay ceiling fan user manual is crucial for safe and proper installation, operation, and maintenance. It provides essential safety precautions to avoid electrical hazards and fire risks. The manual outlines step-by-step installation guides, ensuring the fan is securely mounted and connected. Understanding the features, such as speed settings and remote control functions, enhances user experience. Additionally, it includes maintenance tips to prolong the fan’s life and troubleshooting solutions for common issues. Adhering to the manual ensures compliance with warranty terms and optimal performance. Always refer to the manual before attempting any adjustments or repairs to avoid potential damage or injury.
Safety Precautions and Warnings
Always disconnect power before installation or repairs. Avoid using solid-state speed controls. Ensure a UL-listed mounting box is installed; Keep the fan away from water sources and flammable materials.
2.1 General Safety Guidelines
Always disconnect power before installation or repairs. Avoid using solid-state speed controls. Ensure a UL-listed mounting box is installed. Keep the fan away from water sources and flammable materials. Never operate the fan near open flames or sparks. Ensure proper ventilation in the room. Avoid touching electrical components with wet hands. Follow all local electrical codes and regulations. Keep children away from the fan while it is in operation. Regularly inspect the fan for damage or wear. Immediately stop using the fan if it shows signs of malfunction or instability.
2.2 Electrical Safety Tips
Always disconnect the power supply before performing any installation or repair. Use a UL-listed mounting box to ensure safe electrical connections. Avoid using the fan with solid-state speed control devices to prevent electrical issues. Install an isolating wall switch to safely control the power. Never touch electrical components with wet hands or while standing on a damp surface. Ensure all wires are properly connected and secured. Avoid overloading circuits with additional devices. Keep the fan away from water sources to reduce the risk of electrical shock. Regularly inspect the wiring for damage or wear. Follow all local electrical codes and regulations strictly.
2.3 Fire Hazard Prevention
To prevent fire hazards, ensure the fan is installed correctly and avoid using it with solid-state speed control devices. Keep the fan away from flammable materials and avoid overheating. Regularly inspect the wiring for damage or fraying, and replace any worn-out parts. Ensure proper ventilation in the room to prevent heat buildup. Never operate the fan if it shows signs of malfunction, such as smoking or unusual odors. Keep the fan blades and housing free from dust buildup, as excess dust can ignite. Always follow the manufacturer’s guidelines for safe operation and maintenance.

Installation Instructions
Align the canopy locking slots with mounting bracket screws, push, and secure. Connect wiring carefully, ensuring proper connections for power, speed, and light functions. Test the fan after installation.
3.1 Pre-Installation Checklist
- Verify the ceiling fan model and ensure all parts are included in the package.
- Check for any damage or defects before starting installation.
- Ensure the ceiling can support the fan’s weight and has a UL-listed mounting box.
- Disconnect the power supply to the circuit at the electrical panel.
- Gather all necessary tools and hardware provided with the fan.
- Review the user manual to understand the installation process.
- Ensure the fan is not connected to any solid-state speed control device.
- Prepare the remote control or pull chain for proper operation.
Always follow safety guidelines to avoid electrical shock or damage.
3.2 Standard Ceiling Mounting
For standard ceiling mounting, align the locking slots of the ceiling canopy with the screws in the mounting bracket. Gently push the canopy upward and secure it by tightening the screws. Ensure the fan is level and plumb for proper installation; Connect the electrical wires according to the color-coded system, making sure the grounding wire is securely attached. Tighten all screws firmly to prevent wobbling. Refer to the manual for specific details on aligning and securing the canopy. Always follow safety guidelines to avoid electrical shock or damage during installation.
3.3 Installing the Fan on an Angled Ceiling
To install the fan on an angled ceiling, ensure you have the correct mounting bracket or adapter kit designed for sloped ceilings. Begin by securing the mounting bracket to the ceiling junction box, following the manufacturer’s instructions. Align the fan’s hanger bracket with the mounting bracket and attach firmly. Adjust the fan’s angle to match the ceiling slope, ensuring proper balance. Tighten all screws securely to prevent wobbling. For stability, double-check the fan’s alignment and ensure all connections are tight. Always follow safety guidelines and consult the manual for specific angled ceiling installation details.
3.4 Securing the Mounting Bracket
To secure the mounting bracket, ensure the ceiling junction box is UL-listed and can support the fan’s weight. Turn off the power supply before starting. Align the mounting bracket with the ceiling box and attach it using the screws provided. Tighten the screws firmly to prevent any movement. If the ceiling is angled, use the adapter kit to ensure proper fitment. Double-check the bracket’s stability and balance. Once secured, proceed to install the fan body, ensuring all connections are tight. Refer to the manual for specific instructions tailored to your fan model for a safe and proper installation.
3.5 Connecting the Fan to Electrical Wiring
Before connecting the fan to electrical wiring, ensure the power is turned off at the circuit breaker. Use a voltage tester to confirm there is no electricity flowing to the wires. Align the fan body with the mounting bracket and connect the black (live), white (neutral), and copper (ground) wires to the corresponding wires in the ceiling. Secure the connections with wire nuts or tape. Ensure the ground wire is properly attached to the mounting bracket for safety. Do not use this fan with solid-state speed control devices. Refer to the manual for specific wiring instructions and diagrams. If unsure, consult a licensed electrician.

Operating the Ceiling Fan
Operate your Hampton Bay ceiling fan using the remote control or pull chain. Adjust speed settings for optimal airflow, ensuring comfort in both warm and cool seasons.
4.1 Understanding Fan Speed Settings
Your Hampton Bay ceiling fan offers multiple speed settings to customize airflow. High speed maximizes circulation for cooling, while medium and low speeds provide gentle air movement. The off setting stops the fan entirely. Adjust these settings based on the season and personal preference to maintain comfort and energy efficiency. Proper use of these settings ensures optimal performance and extends the fan’s lifespan. Always refer to the manual for specific speed control instructions.
4.2 Using the Remote Control
Your Hampton Bay ceiling fan comes with a remote control for convenient operation. Use the remote to adjust fan speed and control the light kit. The remote typically includes buttons to increase or decrease fan speed and a separate button for the light. To operate, ensure batteries are installed correctly and the remote is within range of the receiver. The remote allows you to customize your experience, switching between high, medium, and low speeds or turning the fan off. For optimal performance, follow the installation guidelines provided in the manual and ensure the remote is properly paired with the fan. This feature enhances ease of use and customization.
4.3 Pull Chain Operation
The pull chain on your Hampton Bay ceiling fan allows manual control of the fan speed. Each pull corresponds to a different setting: one pull for high speed, two pulls for medium, three pulls for low, and four pulls to turn the fan off. This straightforward mechanism ensures easy operation without needing the remote control. The pull chain is a reliable and intuitive feature, providing quick access to adjust the fan’s performance. Regularly check the chain’s length to ensure it hangs comfortably for easy reach. This traditional control method complements the remote, offering flexibility and convenience for managing your fan settings effectively.
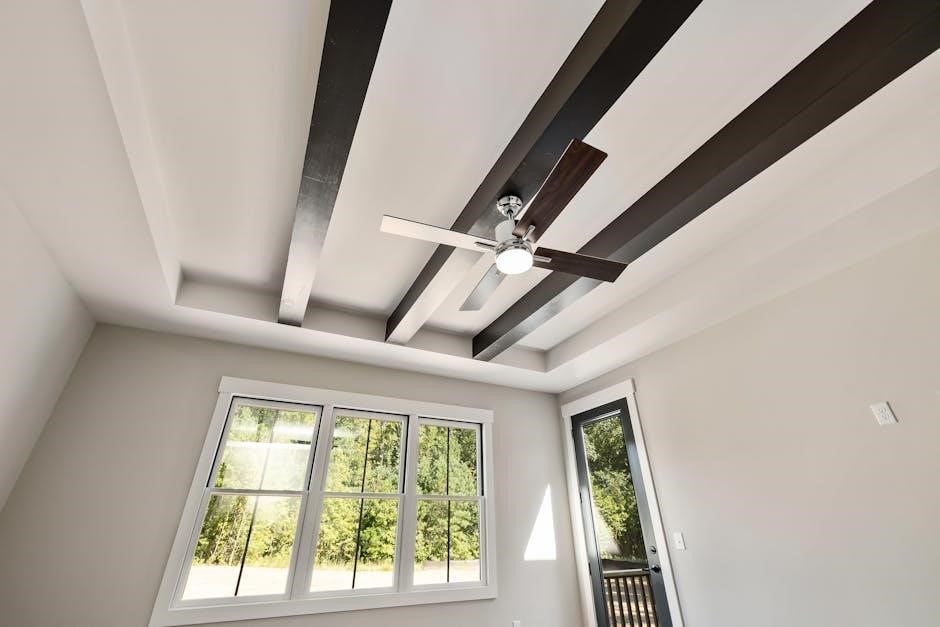
4.4 Adjusting the Fan Direction for Seasonal Use
Adjusting the fan direction is essential for optimizing airflow during different seasons. In summer, run the fan counterclockwise to circulate cooler air. In winter, switch to clockwise to redistribute warm air. This feature enhances energy efficiency by reducing heating and cooling demands. To change the direction, turn off the fan, wait for the blades to stop, and pull the reverse switch located on the motor housing. Proper seasonal adjustment ensures maximum comfort and energy savings throughout the year. Regularly check the switch to ensure it operates smoothly for seamless transitions between settings.

Maintenance and Care
Regular maintenance ensures optimal performance. Clean blades with a soft cloth, lubricate the motor annually, and tighten any loose screws to prevent noise and wear.
5.1 Cleaning the Fan Blades and Housing
Regular cleaning ensures your Hampton Bay ceiling fan operates efficiently and maintains its appearance. Turn off the power supply before cleaning. Use a soft, dry cloth to wipe down the fan blades and housing, removing dust and debris. Avoid using harsh chemicals or abrasive materials that could damage the finish. For tougher stains, a slightly damp cloth may be used, but ensure all components are dry to prevent moisture buildup. Dusting the blades with a soft-bristle brush can also help maintain airflow efficiency. Cleaning the fan housing with a gentle cleaner is recommended for stubborn stains.
5.2 Lubricating the Fan Motor
Lubricating the fan motor is essential to ensure smooth operation and reduce friction. Use a high-quality, silicone-based lubricant specifically designed for ceiling fans. Turn off the power supply and allow the motor to cool. Locate the lubrication ports, usually found near the base or underside of the motor. Apply a few drops of lubricant to the ports, following the manufacturer’s instructions. Avoid over-lubrication, as it may attract dust and cause maintenance issues. Wipe off any excess lubricant with a clean cloth to prevent drips. Regular lubrication helps maintain the motor’s efficiency and extends its lifespan;
5.3 Checking and Tightening Loose Parts
Regularly inspect and tighten any loose parts to ensure optimal performance and safety. Turn off the power supply before starting. Use an Allen wrench or screwdriver to check and secure blade screws, mounting bracket bolts, and glass shade clips. Over time, vibrations may cause parts to loosen, leading to noise or imbalance. Tighten all connections firmly but avoid overtightening, which could damage components. If a part feels excessively loose or cannot be tightened, replace it immediately. This maintenance step prevents potential operational issues and ensures your ceiling fan runs smoothly and quietly. Always refer to the manual for specific tightening instructions.

Troubleshooting Common Issues
Identify and resolve common problems like the fan not turning on, unusual noise, or speed malfunctions. Check power connections, tighten loose parts, and ensure proper installation.
6.1 Fan Not Turning On
If the fan fails to turn on, check the power source by ensuring the wall switch is in the “on” position and the circuit breaker hasn’t tripped. Verify that the remote control or pull chain is functioning correctly. Replace batteries in the remote if necessary. Ensure the fan is properly connected to the electrical wiring during installation. If issues persist, consult the troubleshooting guide or contact Hampton Bay customer support for assistance.
6.2 Fan Making Noise
If your Hampton Bay ceiling fan is making noise, ensure all screws are tightly secured and the fan is properly balanced. Dust or debris on the blades or motor might cause vibrations. Clean the fan thoroughly and check for loose parts. If the noise persists, inspect the mounting bracket and ensure it is firmly attached to the ceiling. Worn-out bearings or misaligned blades can also cause noise. Refer to the troubleshooting guide for detailed steps, and contact Hampton Bay customer support if the issue remains unresolved.
6.3 Fan Speed Not Changing
If your Hampton Bay ceiling fan’s speed isn’t changing, check the remote control or pull chain operation. Ensure batteries are fresh and connections are secure. Inspect the pull chain for obstructions or damage. Verify wiring connections between the fan and control are tight. Test the speed control switch for functionality. If issues persist, consider the fan motor or control module for potential faults. Consult the user manual for specific troubleshooting steps. Regular maintenance, like cleaning and checking connections, can help prevent such issues. If unresolved, professional assistance may be necessary.
6.4 Light Kit Issues
If your Hampton Bay ceiling fan’s light kit is malfunctioning, ensure all connections are secure and bulbs are properly installed. Check for loose wires or faulty sockets. Replace bulbs with compatible wattage and type. Verify the light switch or remote control is functioning correctly. If issues persist, refer to the user manual for specific troubleshooting steps. Ensure the light kit is compatible with your fan model. If problems remain unresolved, consider replacing the light kit or consulting a professional. Proper installation and regular maintenance can help prevent such issues. Always follow safety guidelines when working with electrical components.
Repair and Replacement
For any malfunctioning parts, refer to the user manual for repair or replacement guidelines. Replace damaged components with compatible Hampton Bay parts to ensure proper function and safety.
7.1 Replacing the Light Kit
To replace the light kit, ensure the fan is turned off and unplugged. Remove the glass shade and screws securing the light kit. Detach the old kit and install the new one by aligning it with the mounting bracket. Tighten the screws firmly and replace the glass shade. Ensure all connections are secure to avoid electrical issues. Consult the user manual for specific instructions and diagrams to guide the replacement process safely and effectively.
7.2 Replacing the Fan Blades
To replace the fan blades, first ensure the ceiling fan is turned off and unplugged. Remove the screws or clips holding the blades in place. Gently pull the blades away from the fan. Install the new blades by aligning them with the mounting brackets and securing them with the provided screws. Tighten firmly to ensure stability. Ensure the blades are balanced for smooth operation. Refer to the user manual for specific instructions and diagrams to complete the replacement safely and effectively, avoiding any imbalance or wobbling during operation.
7;3 Replacing the Remote Control
To replace the remote control, start by ensuring the ceiling fan is turned off and unplugged. Check the remote’s battery compartment for correct battery type and proper installation. Replace batteries if necessary. If issues persist, inspect the remote for damage or wear. If damaged, contact Hampton Bay customer support for a replacement. Ensure the receiver in the fan is functioning and properly connected. If the receiver is faulty, it may need replacement. Consult the user manual for reset or synchronization procedures. If under warranty, request a replacement through Hampton Bay. If not, purchase a new remote from Home Depot or their website. Always follow safety guidelines when handling electrical components.

Accessories and Upgrades
Elevate your ceiling fan experience with Hampton Bay accessories. Install a light kit for added illumination, integrate smart home compatibility, or add a remote control for convenience.
8.1 Installing a Light Kit
Enhance your ceiling fan’s functionality by installing a light kit. Turn off the power and refer to the manual for specific instructions. Align the light kit components with the fan housing and secure them firmly. Ensure all connections are tight to avoid electrical issues. Test the light after installation to confirm proper operation. For additional guidance, consult the accessories section or contact Hampton Bay support. Always follow safety precautions to prevent electrical shock or damage.
8.2 Adding a Remote Control
Adding a remote control to your Hampton Bay ceiling fan enhances convenience and ease of use. Ensure compatibility by selecting a remote designed for your fan model. Follow the manual’s instructions to pair the remote with the fan. typically, this involves syncing the remote’s frequency with the fan’s receiver. Test the remote to confirm all functions, such as speed adjustment and light operation, work properly; For troubleshooting, refer to the remote control section or contact customer support. Always ensure the remote is fully charged or replace batteries as needed for optimal performance.
8.3 Upgrading to Smart Home Compatibility
Upgrading your Hampton Bay ceiling fan to smart home compatibility enhances its functionality. Ensure your fan is compatible with smart systems like Apple HomeKit or Google Home. Install a smart hub or bridge, then follow the app’s pairing instructions. Test voice commands or app controls to confirm operation. Refer to the manual for specific compatibility requirements. If issues arise, consult Hampton Bay’s customer support or the smart system’s troubleshooting guide. This upgrade allows seamless integration with your smart home ecosystem, offering convenient control and energy monitoring features.
Energy Efficiency and Eco-Friendliness
Hampton Bay ceiling fans are designed with energy-saving features, reducing power consumption while maintaining performance. Their eco-friendly design supports sustainable living, lowering energy bills and environmental impact;
9.1 Energy-Saving Features
Hampton Bay ceiling fans incorporate advanced energy-saving technologies, such as high-efficiency motors and optimized blade designs, which reduce power consumption without compromising performance. These features are designed to lower your energy bills and minimize environmental impact. By circulating air more effectively, the fans allow you to use your HVAC system less frequently, further enhancing energy savings. Additionally, some models come with LED light kits that use significantly less energy compared to traditional lighting options, making them a sustainable choice for your home.
9.2 Eco-Friendly Benefits of Ceiling Fans
Ceiling fans are an eco-friendly addition to any home, reducing the need for air conditioning and heating. By circulating air, they create a cooling effect in summer and distribute warmth in winter, lowering HVAC usage. Hampton Bay fans are designed with energy-efficient motors that consume less power while maintaining performance. Additionally, pairing fans with LED light kits further enhances energy savings. Using ceiling fans regularly can significantly reduce carbon emissions and contribute to a more sustainable lifestyle, making them a practical and environmentally responsible choice for homeowners.
Customer Support and Warranty
Hampton Bay offers dedicated customer support and a comprehensive warranty. For assistance, contact their service team or visit Home Depot, ensuring your product is covered and maintained.
10.1 Contacting Hampton Bay Customer Service
For any inquiries or assistance with your ceiling fan, contact Hampton Bay customer service at 1-855-HD-HELP or visit their website. Their dedicated team is available to address concerns, provide troubleshooting guidance, and assist with warranty-related matters. You can also reach out through the Home Depot customer service, as Hampton Bay products are typically sold and supported through their stores. Representatives are available from 8 a.m. to 7 p.m., Monday through Friday. Ensure to have your product details ready for efficient support.
10.2 Understanding the Warranty
Your Hampton Bay ceiling fan is backed by a comprehensive warranty program designed to protect your investment. The warranty typically covers manufacturing defects in materials and workmanship for a specified period, usually ranging from 2 to 5 years, depending on the product. It includes coverage for parts and labor under normal use conditions. However, damages caused by improper installation, misuse, or failure to maintain the product are not covered. Review your user manual for detailed warranty terms and conditions. For any warranty-related inquiries, contact Hampton Bay customer service directly for assistance.
10.3 Returning or Exchanging the Fan
Should you need to return or exchange your Hampton Bay ceiling fan, please contact Hampton Bay customer service for guidance. Returns must be made within the specified period, typically 90 days, with the original receipt and packaging. Ensure all components, including the fan, remote control, and mounting hardware, are included. A restocking fee may apply. Exchanges are processed based on availability. For defective products, refer to the warranty section for details. Always follow the return policy outlined in the user manual to ensure a smooth process. Contact customer support for further assistance with your return or exchange request.